

How to Fix Windows 10 Stuck on Welcome Screen
Windows 10 is a strong and reliable operating system that has been around for a long time. However, if you’re not familiar with how to solve its issues, it can lead to significant problems and potential damage.
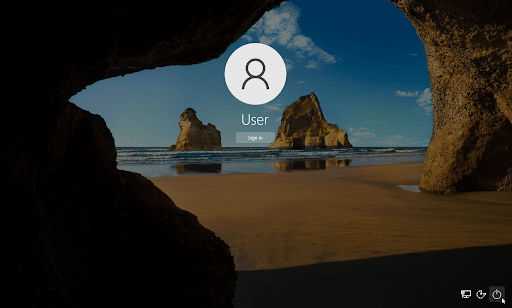
One common problem people face is when Windows 10 gets stuck on the Welcome screen, making the device unusable. The Welcome screen is the first thing you see when you turn on your computer, and it usually shows helpful information like the time, date, and widgets for things like the current weather or breaking news.
If you ever find yourself stuck on the Windows 10 Welcome screen after installing something new, updating your computer, or just after restarting it, this information is for you. In this guide, we will go through some of the most common reasons why your computer might get stuck on the startup screen in Windows 10 and provide easy-to-follow steps to fix it.
Why is Windows 10 stuck on the Welcome screen?
Windows 10 is a sophisticated operating system, which means its problems can be quite complex. Sometimes, the same issue can be caused by different things that happen at the same time. In this section, we’ll break down the most common reasons why Windows 10 might get stuck and not respond on the Welcome screen.
- Issues with startup, such as startup failure
- Incompatible software is installed on your computer
- Driver failure, outdated drivers, or missing drivers
- Recent Windows 10 update failed or didn’t install correctly
- Corrupt Registry entries
- Outdated applications
- Malware
No matter what problem you’re dealing with, this article will help you fix it. Continue reading to see the solutions when Windows 10 is stuck on the Welcome screen and doesn’t load past it!
Before we start — Boot in Safe Mode
Since your system is essentially unusable in its current state, going into Safe Mode is necessary to perform many of the methods below.
Start by confirming whether or not this problem happens when using Safe Mode (as opposed to normal boot mode). If you don’t get stuck on the Welcome screen while Safe Mode is turned on, you can troubleshoot more efficiently by using Windows 10’s tools.
- Reboot your computer and hold the F8 key on your keyboard while the boot screen is visible to enter the Windows Recovery Environment (WinRE). On certain devices you may need to hold down the Fn (function) key as well.
- Navigate through to See advanced repair options > Troubleshoot > Advanced options > Startup Settings > Restart.
- You’ll now see a selection of several restart choices. By pressing F5 on your keyboard, you’ll enable Safe Mode with Networking. Wait for your system to restart and see if it successfully boots.
If you’re able to boot Windows 10 in Safe Mode without getting stuck on the Welcome screen, you can troubleshoot further! For example, scanning your computer for malware with the Windows Defender is a great first step.
Method 1. Startup Repair
Windows 10 has a lot of troubleshooting tools you can access even without entering your system itself! One of these is the Startup Repair tool which attempts to catch and fix various problems that could lead to Windows 10 getting stuck on the Welcome screen. Here’s how to use it:
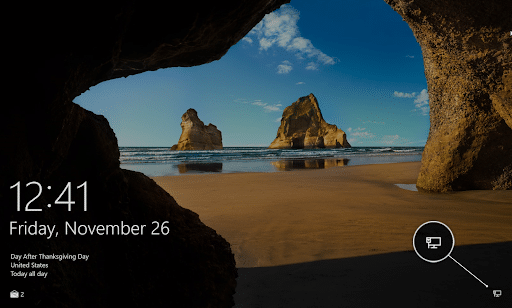
- Click on the computer icon in the lower-right corner of the Welcome screen. This will cause the screen to slide up and display some options.
- Click on the Power icon in the lower-right corner of the screen. It should be the last icon. A menu will open up.
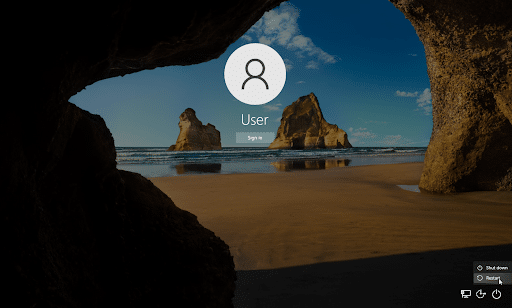
- While holding the Shift key on your keyboard, click on the Restart option. Windows should enter the Advanced Recovery Options menu.
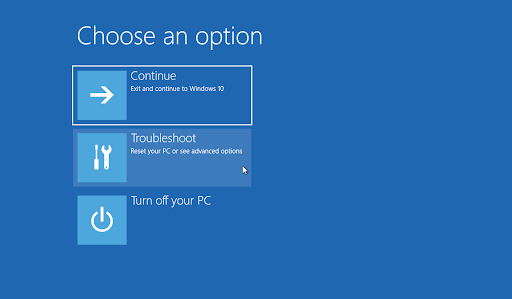
- Select Troubleshoot from the available options. You’ll be able to access some tools to help restore your computer without being able to boot into the system itself.
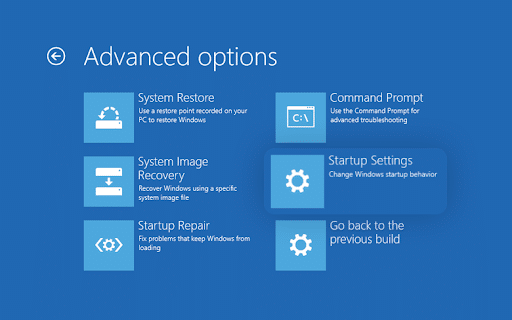
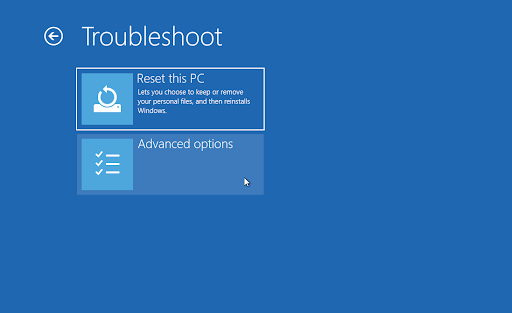
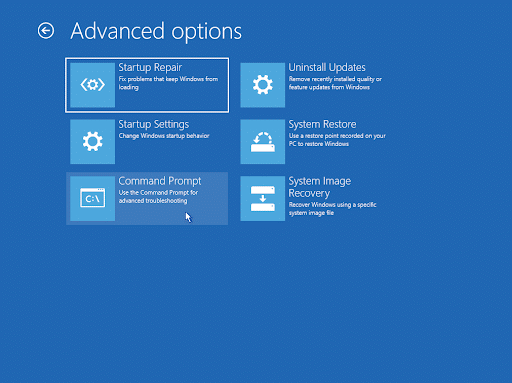
- On the next page, click on Advanced options from the available options.
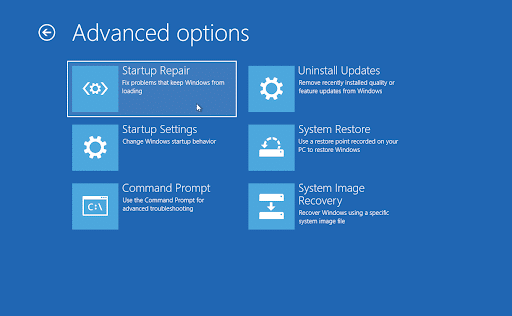
- Once the Advanced options menu loads, click on Startup Repair. This tool attempts to identify and fix problems that may cause Windows 10 to not be able to boot as expected.
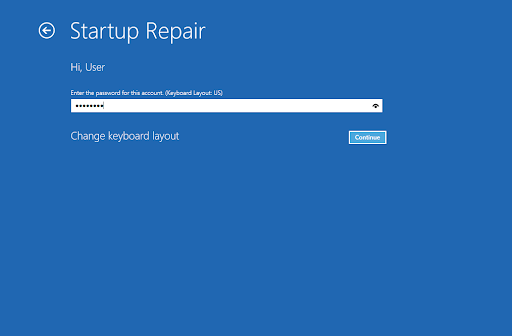
- Your computer will begin rebooting now, and will automatically start with Startup Repair running. Once the menu loads, select your local user.

- Enter your local account password, and then click Continue. If your account doesn’t have a password, simply leave the field empty.
- Wait for Windows 10 to diagnose your computer and detect any problems. If there are issues with startup, you’ll be able to see them and choose how Windows handles them.
Method 2. Run the System File Checker
Corrupted systems files can cause massive problems with your operating system, including boot loops. The System File Checker (SFC) is a built-in tool to help troubleshooting in Windows 10. It’s able to detect and repair corrupt files.
- Reboot your computer and hold the F8 key on your keyboard while the boot screen is visible to enter the Windows Recovery Environment (WinRE). On certain devices you may need to hold down the Fn (function) key as well.
- From the Choose an option screen, navigate to Troubleshoot > Advanced options > Command Prompt.
- Type in the following command and press Enter to execute it: sfc /scannow
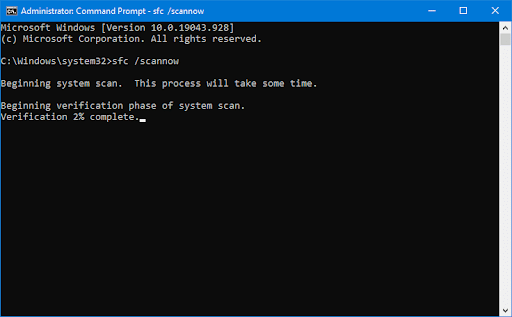
- Wait for the System File Checker to finish scanning your computer. In the case of a discrepancy, the utility will restore system files and fix all errors related to them.
When the scan is complete, restart your computer and see if you’re able to get past the Welcome screen. If so, you’ve successfully solved the issue with the System File Checker’s help!
Method 3. Run the DISM command
As we mentioned, corrupted systems files can cause massive problems with your operating system. You can identify and repair faulty system files through the SFC scan, but you can also use the DISM tool to target other areas of your device that may store corrupt files.
The DISM tool also allows you to identify and fix corruption issues with your system by simply running commands in the Command Prompt application. It checks for corruption system-wide and automatically attempts to restore damaged or missing files.
- Reboot your computer and hold the F8 key on your keyboard while the boot screen is visible to enter the Windows Recovery Environment (WinRE). On certain devices you may need to hold down the Fn (function) key as well.
- From the Choose an option screen, navigate to Troubleshoot > Advanced options > Command Prompt.
- Next, you need to execute a command to fix any issues found on your system. Simply type in the following line and press Enter: DISM.exe /Online /Cleanup-image /Restorehealth
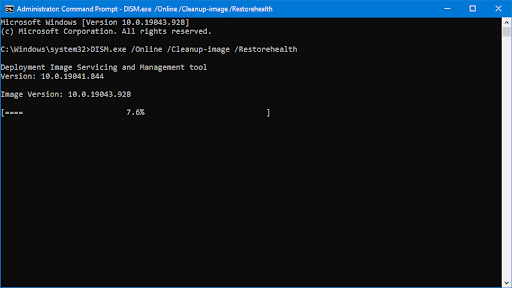
After you execute the command, wait for the process to finish. Upon completion, close the Command Prompt window and restart your device to see if you can get past the Windows 10 Welcome screen.
Method 4. Disconnect all USB devices
You’re probably using at least one USB device with your PC. In rare situations, this might lead the Windows 10 system to become stuck on the Welcome screen. Remove any USB devices that are connected to your computer and restart them. Check to see if this resolves the problem.
Users have stated that unplugging all USB devices resolved the issue for them, so give that a shot. You may also try detaching USB devices one at a time to see which one is causing the problem.
Method 5. Disable Fast Startup
Fast Startup is a confusing and sometimes even harmful feature. It can cause problems with shutdown, for instance. This could lead to Windows getting stuck on the Welcome screen after restarting your computer. Follow these steps below in order to disable Fast Startup mode so it doesn’t cause issues.
- Boot your computer into Safe Mode.
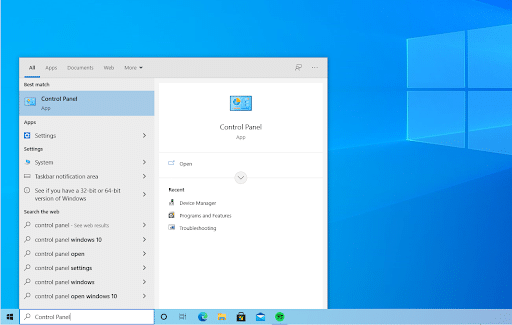
- Click on the Windows icon in your taskbar, and then search for the Control Panel. Launch the application from the search results.
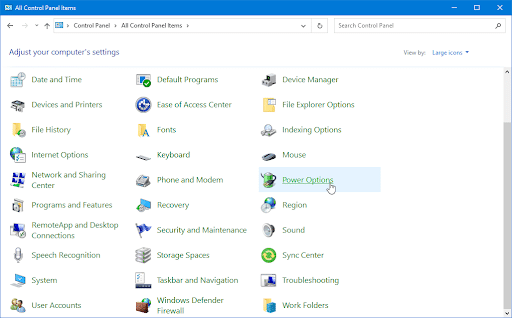
- Click on Power Options. If you can’t see this, make sure to switch the view mode to either Large icons or Small icons.
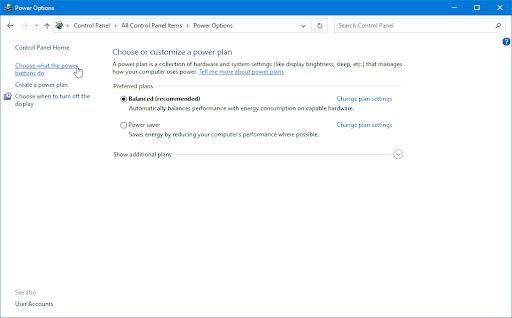
- Click on the Choose what the power button does link in the left-side pane. You’ll be redirected to a new page.
- Before you can make changes, you need to click on the “Change settings that are currently unavailable” link. This will unlock your options.
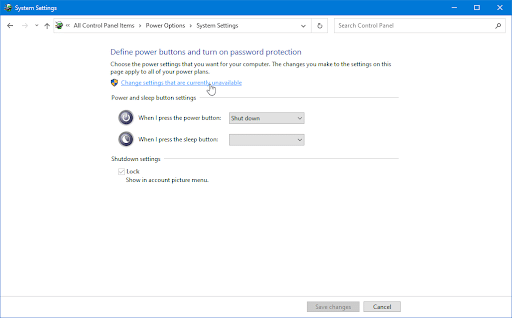
- Make sure to uncheck the Turn on fast startup (recommended) option. Make sure to click the Save changes button to apply the changes before restarting your computer.
Method 6. Disconnect from the internet
Users report that Windows 10 gets stuck on the Welcome screen because it’s attempting to connect with your Wi-Fi network. To resolve this issue, briefly deactivate and see if it fixes the problem.
If you’re not a network administrator, try unplugging the dongle from the outlet for some time (around less than one minute) before reconnecting again. Check whether your computer is able to boot into Windows 10 afterwards. If you’re still dealing with the issue, do some more troubleshooting steps like disconnecting Ethernet cable as well.
These two things have been known to work wonders! It may take time to restart your PC many times, but just remember: patience always pays off. Disconnecting Wi-Fi and connecting the PC directly to a router may also resolve the issue, so you might want to give it a shot.
Method 7. Boot your system in Clean Boot mode
As a way to ensure that your computer runs without third-party services, start in “clean boot.” This will clear any applications and third-party conflicts off the system before booting. See if there are still issues with Windows getting stuck on the Welcome screen when in a clean boot state.
This is how you can perform a clean boot on your Windows 10 system:
- Boot your computer into Safe Mode.
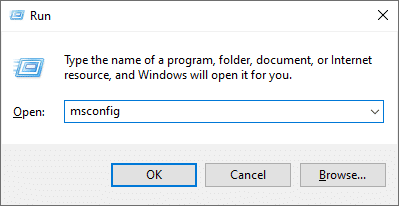
- Press the Windows + R keys on your keyboard to bring up the Run utility in a new window.
- Type in “msconfig” without the quotation marks and press the Enter key on your keyboard. This will launch the System Configuration window.
- Switch over to the Services tab. Make sure that you check the Hide all Microsoft services box. This is going to ensure that you only see third-party services.
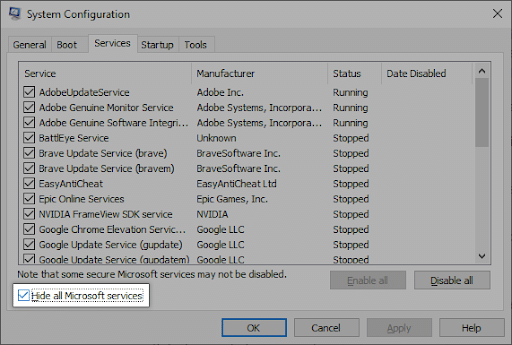
- After hiding all system services, click the Disable all button to disable every third-party service on your device.
- Click the Apply button and restart your computer. When you boot next, your computer will only initiate essential Microsoft services.
- Restart your computer. You’ll be in a clean boot state with only official Microsoft services running. Check if the Windows Driver Foundation is still using up CPU resources in this state.
- If you notice that the Windows Driver Foundation is no longer causing high CPU usage in a clean boot state, there’s a service causing the issue. You need to identify it and replace the associated driver, app, or disable the service altogether.
Method 8. Remove laptop battery
If you are experiencing this issue with your laptop, there is a chance that removing its battery will fix it. Simply shut down the device and remove any removable batteries for about five minutes. After waiting, place the battery in your laptop and see if the problem persists.
If you have spare laptop batteries, consider changing your old one to see if that helps. You may need to purchase a new battery if you’re able to diagnose this as the cause for this error.
Method 9. Restart the Windows Update service
Some users report that this frustrating error is caused by Windows updates. In this case, restarting the Windows Update service may help you resolve the problem. Afterward, you’ll be able to use your computer again.
-
- Reboot your computer and hold the F8 key on your keyboard while the boot screen is visible to enter the Windows Recovery Environment (WinRE). On certain devices, you may need to hold down the Fn (function) key as well.
- From the Choose an option screen, navigate to Troubleshoot > Advanced options > Command Prompt.
- Run the following commands, pressing the Enter key on your keyboard after each line to execute them:
- net stop wuauserv
- cd %systemroot%
- ren SoftwareDistribution SD.old
- net start wuauserv
- Restart your computer and see if you can boot into Windows 10 now without getting stuck on the Welcome screen.
Final thoughts
Have you been experiencing a problem with your Windows 10 computer that has the Welcome screen stuck on it? If so, we hope our methods helped show you how to troubleshoot this issue.
If you still have questions about how to fix other issues with Windows, please contact NovaCore Solutions for a free consultation.